![]()
Editor42 was created by Frederick "Coincoin" Taillon back in the early days of Battlefield 1942 before the Battlecraft editor. It has been an important tool in my Battlefield editing tool box ever since. The editor when extracted has a readme file with directions on its setup. This tutorial is meant to supplement these instructions. Thanks Coincoin for this great editor from the Battlefield community.
WinRFA supplied with the Battlefield MDT 2.75
Beginner to medium.
A very good working knowledge of how the bf1942\BfVietnam directory structure works. This is especially important if you are working with a mod or with maps that contain custom objects.
Keyboard Shortcuts
Here is a link to the users guide from Coincoin's site now hosted by AudioGod. You need to look this over now. It will explain a lot of things about the editor.
Getting Started
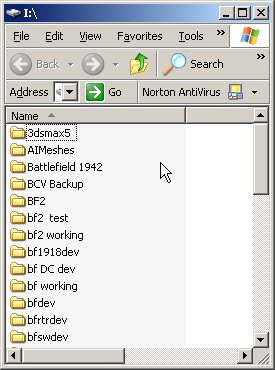
Setting up and using Editor 42 is a bit different than the Battlecraft editors. First it works with "extracted" archives instead of reading the rfa archives directly. The first step in setting up ED42 is to create a working folder commonly called a "dev" folder. It can be anywhere but I suggest the root of the drive for convenience. I name mine bfdev, bfvdev, bfdcdev and so on. The following image is of my dev folder drive. In these folders you extract the mod archives. By this I mean the objects, standardMesh, and texture rfa archives for the mod. Lets use stock bf1942 as an example. First we create a dev folder named "bfdev" or "bf_dev" what ever your flavor as it can be anything you want. Next using WinRFA you need to extract the Objects.rfa file to this directory. Next extract the standardMesh.rfa. Notice that there is a standardMesh and a standardMesh_001.rfa. Extract the standardMesh.rfa FIRST then the standardMesh_001.rfa in that order. Next do your textures and remember to do them like the standardMesh rfa's, the main texture folder then the texture_001 rfa. This is because the _00?.rfa archives are updates or add-ons.
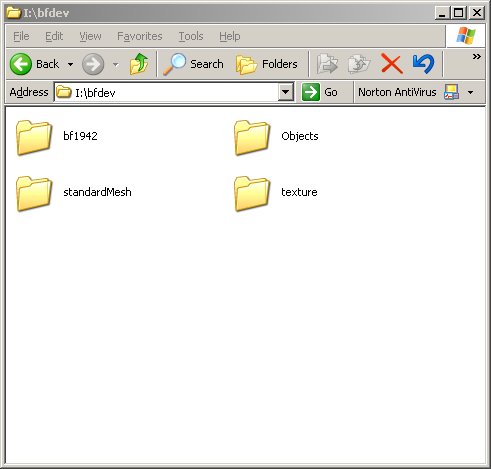
Next we need to extract some maps to work with. Lets start with Battleaxe. Again using winRFA extract your map to this base directory. Remember as there are _00?.rfa files with this map to again extract them in order! go ahead and extract another map or two to get the feel of it. Ok once you have this done you should have a directory structure like the one pictured here.
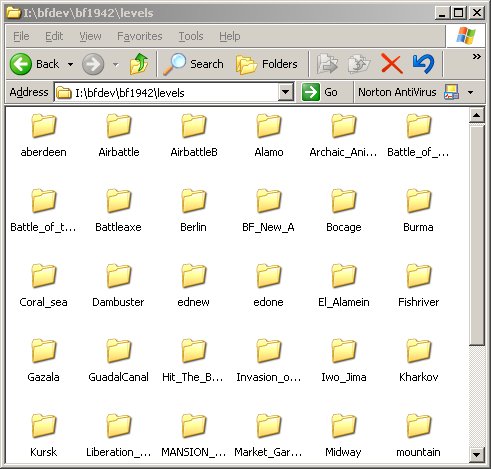
If you open the bf1942\levels folder you should see the maps you extracted .
Now lets extract\install Ed42. First make a folder to extract it to ... again I like to use the root directory like C drive and Editor42 as the folder name. You can chose what you want. Now extract ED42 to this folder and you will see the following files\folders.

Now simply make you a shortcut on the desktop to the Editor42.exe file. Lets open ED42 and see what it looks like by double clicking the Editor42.exe.
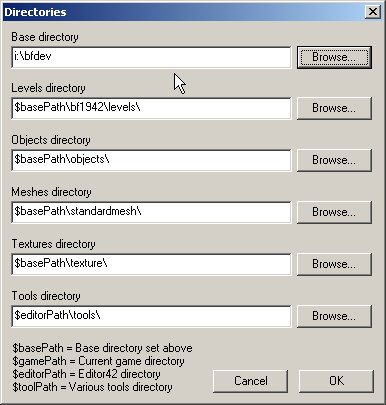
Now the first time you run ED42 it will probably pull up a window like the one above asking you to set the directory paths. Here all you need to do is set your "Base directory". Click on the Browse for this field and navigate to the bfdev folder you made and extracted the archives to. You see above I have mine already set for my bfdev folder on my "i" drive. Yours will be different from mine depending on drive and name of folder. Do not change the other directory settings unless you know what you are doing! They are set just right if you followed my instructions above on setting up the dev folder. As you create more dev folders with different mods all you have to do when ED42 opens is click on > File > Directory > Browse > to the one you want ED42 to use.
Click ok and you will see the editor interface.
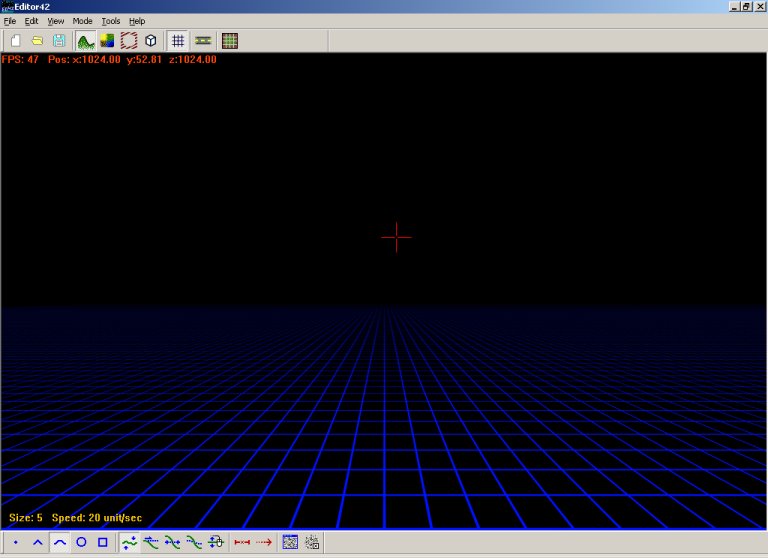
Editor 42
Ok now once in the ED42 interface up in the upper left hand corner you see the tool bar. Select the icon that looks like a yellow folder. You will see this window and in it the map(s) you extracted to the dev folder. If you do not or get a error you have something wrong. First select file then directories from the drop down and make sure that the Base directory is the dev folder you made.
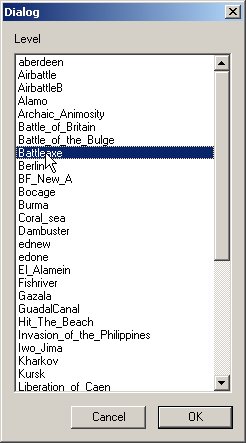
Ok if you extracted Battleaxe as per directions above select it now and click ok (or double click the map name) and here is Battleaxe opened in ED42.

Now you can create a map from scratch using Ed42 but be cautioned, this is a "hands on" manual editor. By this I mean it has some quirks about naming for spawnable objects and when you save the level it does not add all the con files needed to run in game. You have to create these yourself. The best way to work with your own custom map is to create the basic map in Battlecraft and extract\port it to ED42. Now you have a complete map ready to run. One real cool feature of ED42 is that you can save different parts of the map. For instance if I am pathmapping or texturing I save only the textures.
I use ED42 for the following tasks;
Texturing my maps. There is no better Battlefield editor for terrain textures. I have so far two tutorials for map texturing with ED42 in my tutorials section.
Creating and editing bf1942 & BFV pathmaps. This is the only editor I know of where you can convert your pathmaps into terrain (another tutorial) using a tool by Rexman and hand paint your pathmaps with objects in place.
Terrain-Heightmap creation\tweaks are another thing Ed42 excels at.
Now to use ED42 with Battlefield Vietnam is a bit tricky. First thing is that it will not work with version 1.2 because of the sm file format change. There was a change to the use of 64byte tangents/binormals and ED42 will not read these. I extracted everything from the 1.2 version for my bfvdev folder and copied over the standardMesh archive from version 1.1 and letting it over write. The only archive that matters is the standardMesh as this is where the change took effect. What you have to do to get the additional static's into ED42 is to import all of the static's that are new to version 1.2 and later into 3Dsmax (with the Battlefield plug in from the MDT 2.75) and export again with the 64 byte option unchecked and they work fine, just add them to the bfvdev\standardMesh folder. Dnamro and I are working on a complete set of the additional static's but may need someone\place to host the file once finished. This depends on how many static's are converted for how many BFV mods.
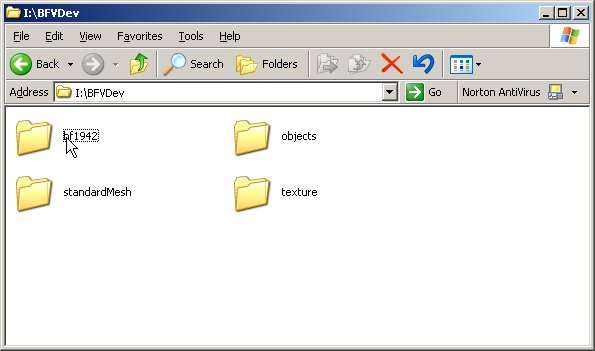
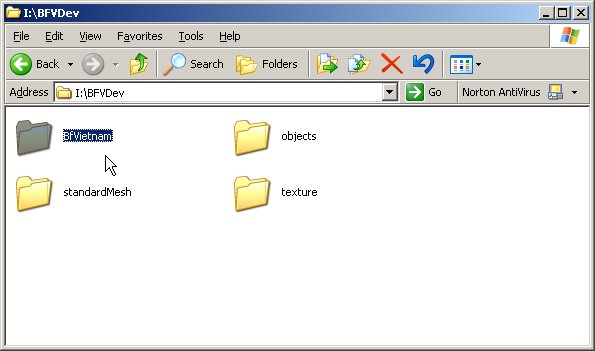
The next thing you have to do is rename the base folder in the bfvdev directory from BfVietnam to bf1942. This is because BFV extracts to base folder name BfVietnam and ED42 does not recognize that.
Change this ...
To this ...
Next you need to make a minor change to the maps Terrain.con file in the Init folder and change the following lines to reflect this.
GeometryTemplate.file bf1942\levels\Map_Name\Heightmap
GeometryTemplate.materialMap bf1942\levels\Map_Name\Materialmap
GeometryTemplate.texBaseName bf1942\levels\Map_Name\Textures\Tx
GeometryTemplate.detailTexName bf1942\levels\Map_Name\Textures\Detail
Change to ...
GeometryTemplate.file BfVietnam\levels\Map_Name\Heightmap
GeometryTemplate.materialMap BfVietnam\levels\Map_Name\Materialmap
GeometryTemplate.texBaseName BfVietnam\levels\Map_Name\Textures\Tx
GeometryTemplate.detailTexName BfVietnam\levels\Map_Name\Textures\Detail
Now the BFV map will open in ED42.
This section in progress
This section in progress
This page is still a work in progress and will be edited and added to. I plan to do a part two soon to get into more detail on its use. You can also find this information in my "Pathmapping with ED42" tutorial.
Back to: Top
Back to: Tutorials
content © cajunwolf 2006