| |
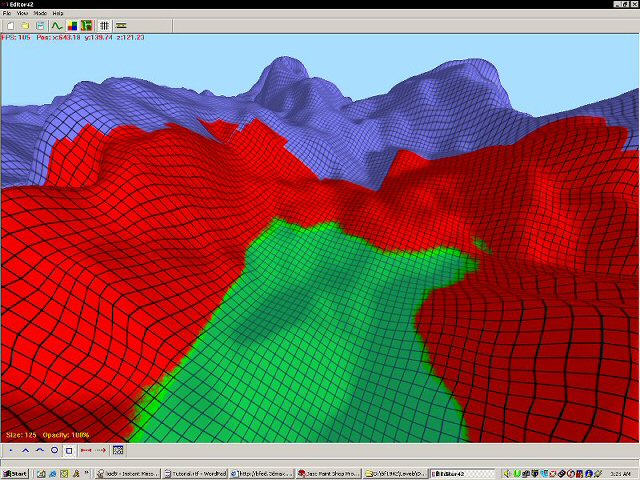
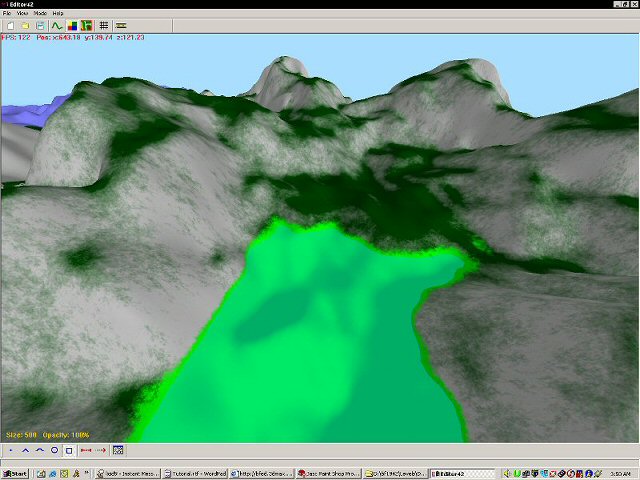
Ok, you've got your level's terrain layed down pretty well, and you're ready to texture this baby. But all Editor42 shows you is a totally black texture. Thats fine, we'll get that changed into a good looking texture in no time at all. Your first decision of course should be what kind of terrain you want. Do you want sand? Is it an island? Is this europe? Is it rocky? Are there mountains? All of these will be important in the selections you make when you texture. Next, pick a section of terrain that you think represents how the majority of your terrain will look. It would be wise to pick a section that extends from your lowest point to near your heighest point, but its not completely nessesary. For this example I plan to use a Western European look, complete with grassy hills and snowy mountains. |
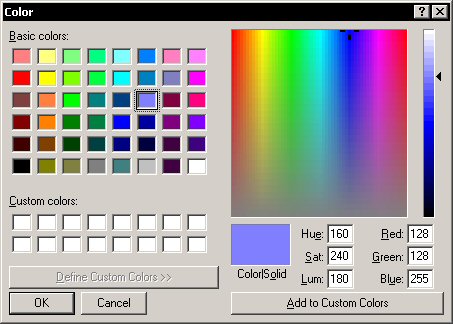 |
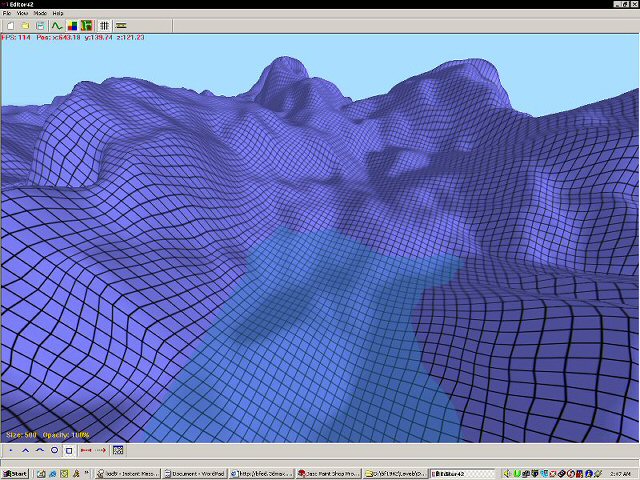
So where do you start? Well, first thing first, you need to be able to see what you are doing. I like to paint my texture in one basic color, a light blue. This helps me see the lay of the terrain, as well as offering contrast to the grid lines that are black in texture mode. When not using the grid lines (G key), toggle off the detail texture by pressing the T key. The detail texture can slighty change the way your final texture looks, but it is better to paint your texture without the detail texture. You will get a better idea of what your texture will look like without the detail texture, and it is easier to paint without it on. So right now, go ahead and paint at least your section of terrain the blue base color. Below is a picture of the color I use and the way my root layer dialog box looks. To get a plain color click the box under the words "Single layer" and select "Plain color" from the Layer Selection box. Then hit the Edit button to choose the color you want to paint on your terrain. |
|
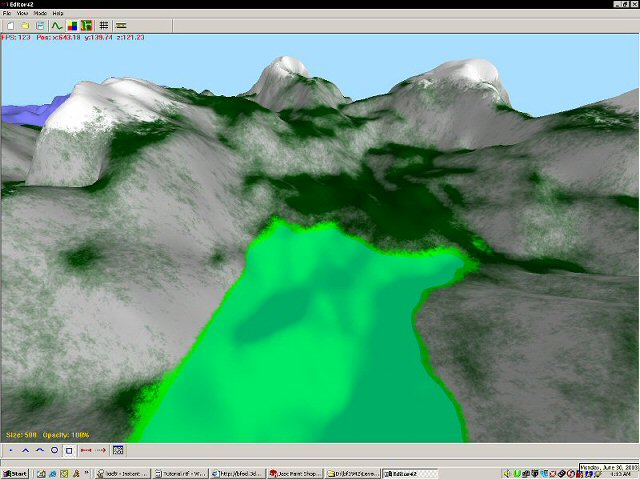
Most of my maps contain water. It gives
the map a real world feel and also makes the gameplay far more
interesting. The map I am using for this is an example level I created
just for this tutorial, so I picked a section of the terrain that contains
a lake like area. I want the texture under the water line to appear in a
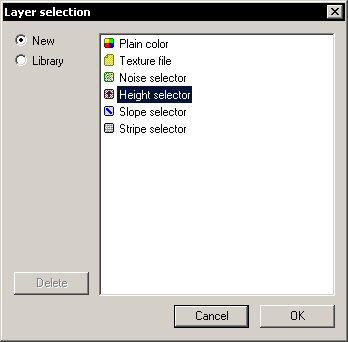
dirt color, so for this application I will use a Height selector. Select
this the same way you selected the Plain color
layer. Now that you have the Height selector set as your layer, click the edit button to the right and bring up the configuration box. By default two Plain color layers are selected. I set the top layer tp Red and the bottom one to Green. These two colors contrast each other nicely and make it easy to see how my settings effect the layer. I know my water line is somewhere around 30, so I setup the Height Layer Threshold to intial both 30. This will give me a nice solid line that I can use to distingush exactly where the brush will switch from one color to the other. You will have to play around with this setting until the colors switch at your water line, which I have done. My final setting you can see below, a Threshold of 69 gives me a perfect line right at my water line. The other setting I changed is the Threshold width. This setting adjusts the mixing of the two colors where they meet, a heigher setting resulting in more mixing. Since I want a solid line I set this to 0 for now. Additionally, There is no real need to change the Noise gradation settings for this layer. Any Seed setting will do as it is random. The default setting of of 1 and 9 for First Octave and Octave Count are prefectly acceptable. These are most useful when creating new base textures, which I won't go into in this tutorial. As you can see it is also not important to color the entire terrain again, you simply need to paint the area you are focusing on. |
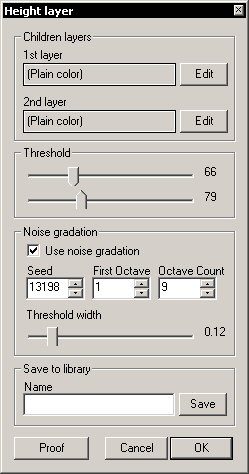 |
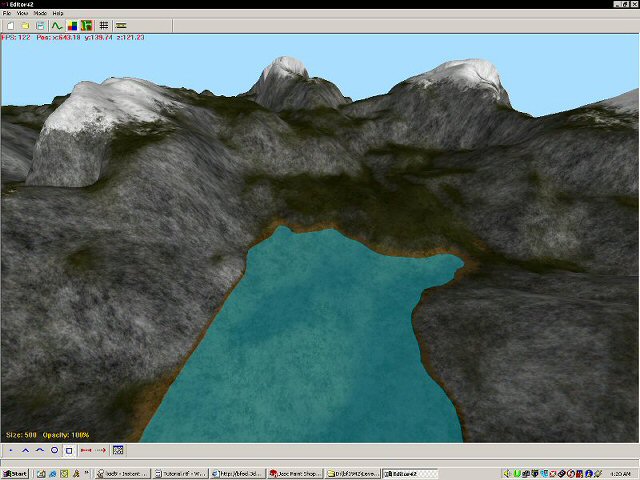
Now real water lines are not perfectly
flat, so we need to adjust some settings in our height layer to make this
transition smoother. For starters I want the water line to have the look
like it has some variation. To do this I need to adjust the Threshold
setting. If you recall the orginal setting was 69, I don't want the water
line to go much below that, so I reduce the top slider only a little, down
3 to 66. The real adjust ment here is the bottom slider. I raise this
several points and finally I decided on 79. This gives me a decent amount
of variablity in the water line. However, the transition still isn't
smooth, to get this effect I need to adjust the Threshold width. A setting
of 12 gives me the desired mix. Before we go on, we want to save. Type a name in the Name box and click Save. Now those settings are accessable from the library. I will show you how to retrieve them later in the tutorial. |
 |
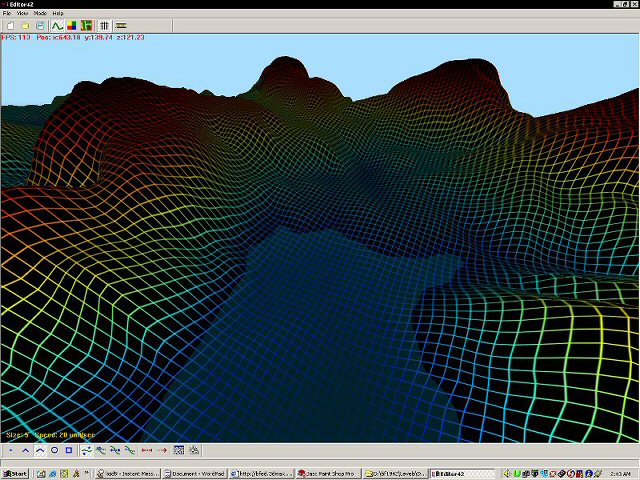
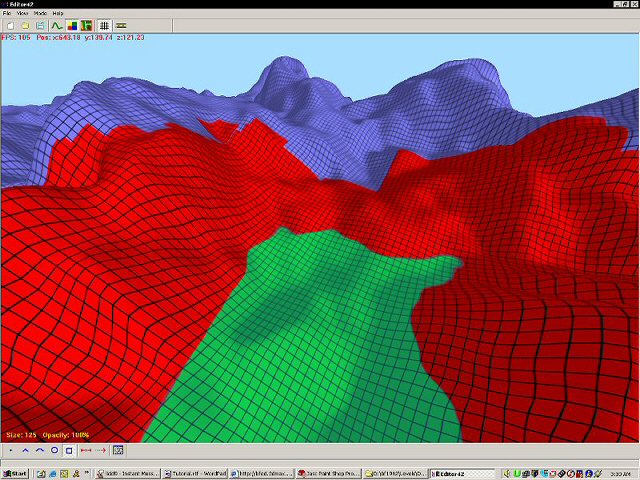
There's quite a variation in the height
of my terrain, so I am going to want part of my terrain to be rock and
part to be grass. I want this in addition to the water line, but I only
want it above the water line. I also want to be able to use a single brush
and sweep over my terrain and have it paint the water line and grass and
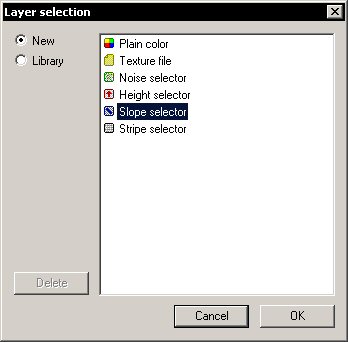
rock. It sounds complex, but really its easy. To begin with, we need to
replace the terrain that was red in our previous picture with grass and
rock. To do this we have to modify the Height selector. The Height
selector contains two Plain color layers, the first of which is Red. We
want our grass and rock to depend on the slope of the terrain, so we want
to replace the first Plain color layer with a Slope selector. To do this,
click the Plain color box and select Slope selector in the Layer selection
box that appears. Now click the edit button to the right of the Slope
selector. |
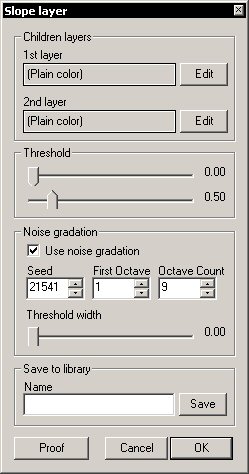 |
The Slope Layer also contains two clors
by default, and this is fine. The settings here are similar to the Height
Layer but the perform slightly different purposes. You may notice right
away that the thresholds are no longer on a scale of 0-255 but start at
0.00 and 1.00. These two numbers determine where Editor42 will use each of
the two layers set above. Again you want to select two contrasting colors.
Since here I want to know where grass will be and where rock will be I set
the top layer to Dark Green and the bottom layer to Grey. I also adjusted
the bottom slider down to 0.50. I have never moved the top slider, and I
suggest that you don't here either. This bottom slider adjusts where
Editor42 will draw green and grey. A setting closer to 0 will draw more of
the 1st layer (Green) and a greater setting will draw more of the 2nd
layer (Grey). I found a setting of 0.50 fit the height of my map. You will
have to play with this setting until you get a setting you like. Again I
left the Noise Gradation alone and set the Threshold width to
zero. |
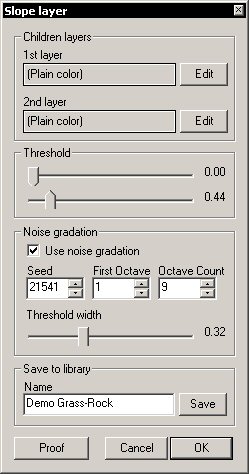 |
Now that I have found a Threshold
setting that I liked, it is time to adjust the Threshold width. While I
used a rather small setting of 0.12 for the water line, I want more of a
mix between my rock and grass. In order to accomplish this I set my
Threshold Width to 0.32. When I did this I discovered the mixing resulted
in more rock than I wanted, so I lowered the Threshold according. I also
wanted to save my work, so I found the Height Layer that I had previously
named and clicked the save button there. This is the root layer, saving
this will save both that layer and all the layers beyond it, in this case
the Height Layer and the Slope Layer as well as all their settings are
saved as "Demo Full." I also want to save the slope layer seperately
incase I want to use it in another map for example, so I name the Slope
Layer "Demo Grass-Rock" and saved it. That way I can access just the Grass
and Rock layer later if I want. This will be important in Step
5. |
 |
I've decided that I want to include a
snow cap to the high peaks. This will require some changes in our layers.
It is a good thing we decided to save our layers together and seperately
above in Step 4. Open the properties for the base Height Layer. Instead of
a slope layer we now want a height layer since I want to paint a certain
texture above a certain height. Now open the properties of the Height
Selector. By experience I know I have to select a plain color of white to
in the 1st layer to paint the peaks white. The other layer will be our
Demo Grass-Rock we saved before. In order to get this click the 2nd layer
box, then in the Layer selection box select Library. I have a lot in my
Library, yours may not be quite that full, but in there somewhere should
be Demo Grass-Rock. Select it and hit OK. |
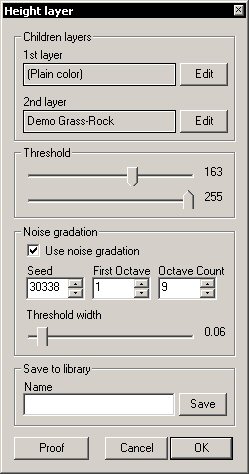 |
The settings here are similar to the
settings for the water line. The Threshold I set to 163 and 255. This
gives me a nice smooth transition between the snow and rock-grass layer.
To help this smoothing I set the Threshold width to 0.06. Again, I left
the Noise Gradation settings alone. |